
The process of installing a metal fence varies according to specific factors, including:
- the type of mesh chosen (simple torsion, knotted, electro-welded, in rolls or in panels);
- the type of soil on which the installation will be carried out;
- the primary purpose of the fence itself: anti-intrusion, protective, ornamental, etc.
This article offers an overview of the fundamental steps, which are applicable in every situation, as well as the safest and most commonly used installation techniques, with a section dedicated to electro-welded mesh and simple torsion fences.
1. UNDERSTANDING THE REGULATIONS
First of all, you should look into your local regulations and find out about any neighbourhood rules or regulations, to get a good understanding of the limits and restrictions to be adhered to.
2. STUDYING THE SOIL
It is a good idea to start by identifying the precise boundaries of the space to be fenced. In this regard, we advise that you leave about 10 cm of distance between your property’s boundary line and the holes for the fence posts, to avoid intruding on neighbouring property.
Also remember to identify the layout of any pipes and cables installed in the ground, so as to avoid damaging them during installation.
Finally, you need to analyse the features of the land where the installation is to be carried out. Factors such as slopes and soil composition can actually impact your choice of fencing and installation methods. For example, if the soil is robust and compact it can be used as a base for the installation of the posts, but otherwise concrete or screw piles should be used.
3. OUTLINING THE PROJECT, PLANNING THE WORK
You should now accurately trace the perimeter of the area to be fenced, using a mason’s line as a guide. Once this task is complete, you should measure the overall length of the defined perimeter, so as to establish how many posts and metres of mesh (or how many panels) are required. This is the ideal time to determine the type of posts that will suit your needs. Posts are typically divided into:
- end posts (with only one reinforcement strut);
- intermediate posts (without reinforcement struts);
- corner posts (with two struts at a ninety degree angle);
- reinforcement posts (with two struts).
This distinction applies to chainlink and electro-welded mesh in rolls, but not to modular panels, which are installed without struts. The ideal distance between one post and another varies largely according to the type of mesh used (chainlink or electro-welded). In particular, for simple torsion mesh the ideal distance between one post and the next is two and a half metres, while for electro-welded mesh it can vary between two metres and two and a half metres. Finally, if you have opted for a panel fence, remember that the length of the panels serves as a guide for the post installation process.
Before starting the actual installation, make sure that the outlines created are correctly aligned and mark the exact position of the posts, struts and gates using pegs, chalk or spray paint.
4. INSTALLING THE FENCE POSTS
You can now move on to the actual installation of the posts. The end posts are the first to be positioned, followed by the intermediate posts.
Taking into account the range of different methods that can be used for this operation, we have chosen to describe here the most important.
Installation using concrete
First of all, you need to dig a hole (measuring around 35 to 40 cm on each side) between 25 cm and 50 cm deep depending on the height of the post. You can now spread a layer of well-compacted gravel (about 10 cm) at the bottom of the hole to serve as a base for the concrete block. Check that the hole depth is correct by inserting the post: if the distance from the ground to the top of the post is the height of the mesh plus 5 cm, you can continue to the next step.
Be sure to check that the post is straight using a level, and lock it in position with clamps and wedges, then pour the concrete around the post. An alternative method is to fill the hole with concrete first and then insert the post until it touches the gravel base, holding it firmly in place with supports. Once again, it is essential to check the alignment with a level. We advise that you wait until the concrete is totally dry, bearing in mind that times will vary according to the chosen cement mortar.

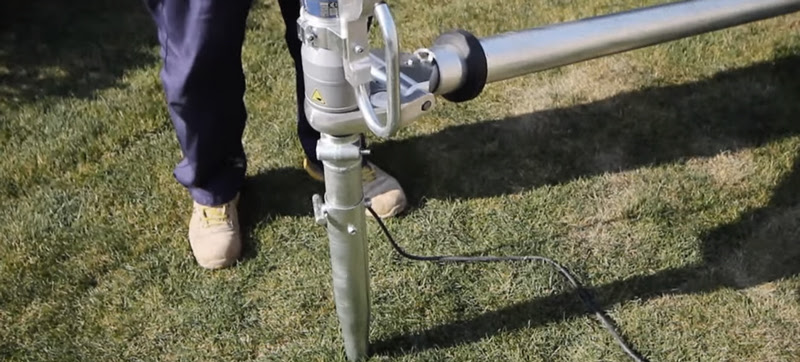
Installation using screw piles
Screw piles represent another possible option. If you choose to use them, proceed as follows: manually fix the screw in the ground, insert the pin into the appropriate holes in the screw and insert the screwdriver from above. Plant a pin in the ground about two metres away and connect it to the screwdriver to act as a stop for the stabiliser. Insert the latter into the appropriate slot and check the verticality of the screwdriver with a level (some models include a convenient built-in spirit level). Start the screwdriver and install the pile until it reaches ground level. Position the post in the pile, adjust the height and fix it in place using the three screws on the base of the pile. Once again, it is essential to check the alignment of the post using a level.
Direct installation into the ground
Alternatively, you can install the posts directly into the ground at a depth of about 50 cm.
After installing the end posts, stretch a wire between them to allow for easier alignment of the intermediate posts.
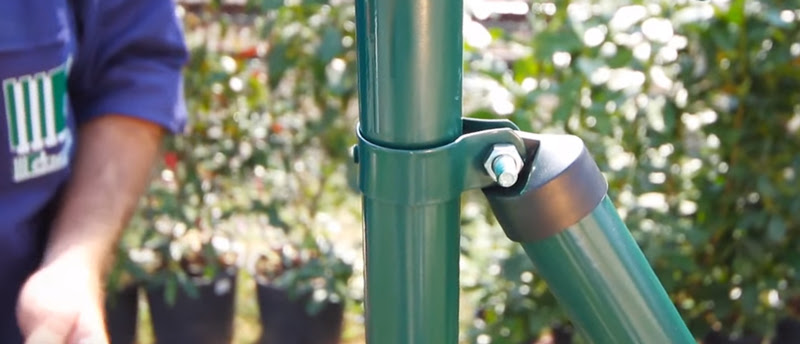
Once all the posts have been installed, the next step is fixing the struts. The struts must be fixed to the posts using the appropriate metal collars or screws and nuts. We advise that you permanently lock the struts in place using self-tapping screws.
5. INSTALLING THE MESH
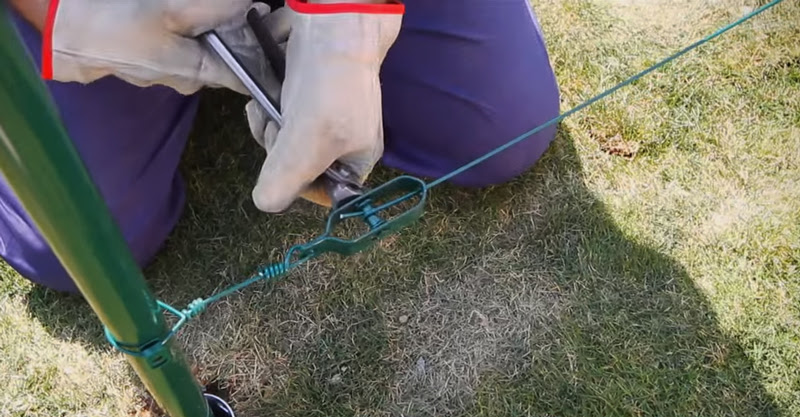
You can now move on to the tension wires. They are installed as follows: using iron wire or hooks, fasten the strainers to the first end post at three different points: at the base, in the centre and at the top, to correspond with the relevant slots.
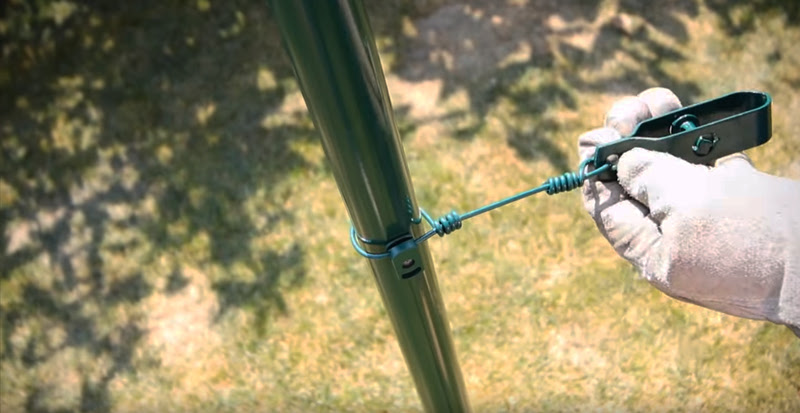
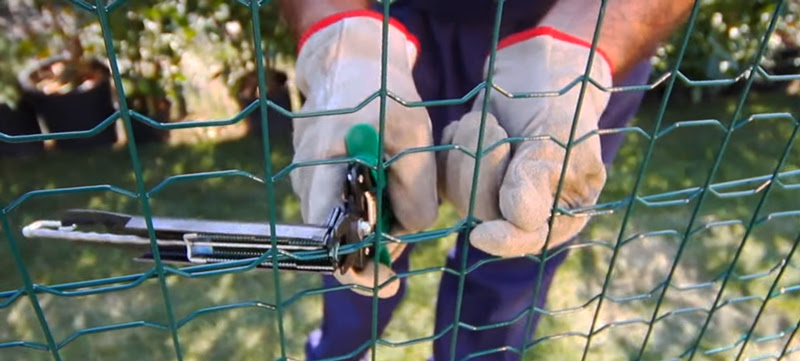
Thread the first wire to be stretched through the inner workings of the strainer and then through the appropriate housing on the intermediate posts, and finally fasten it to the strainer on the post at the opposite end. Cut the excess wire and use a set of pincers to stretch the wires, starting with the lowest one, until you reaching the desired level of tension.
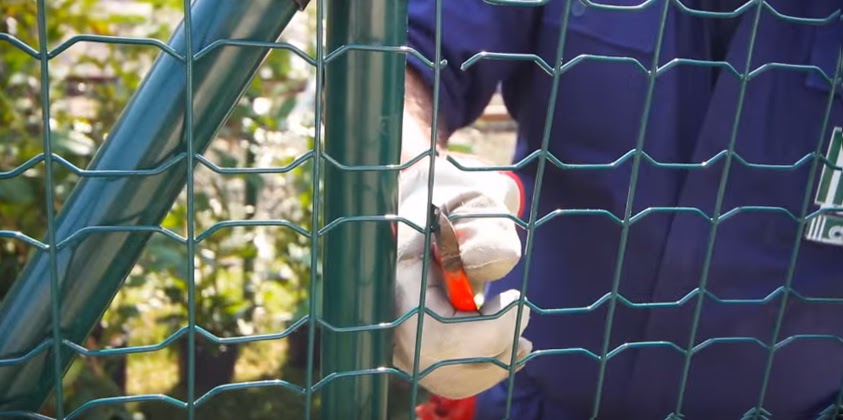
Then fix the end of the mesh to the first post, removing any protruding elements using pincers, in order to obtain a better aesthetic result and avoid any risk of injury. Unwind the roll of wire mesh and stretch it out as much as possible, then fix it to the intermediate posts using iron wire, always being sure to remove any excess. Once the mesh it is attached to the opposite end post, you can also remove any excess mesh.
Finally, join the mesh to the tension wires using a stapler.
And there you have it: a sturdy and safe metal fence. We would like to conclude this short guide with a list of the tools you will need during installation.
THE TOOLS YOU NEED TO INSTALL A FENCE
- Simple torsion or electro-welded metal mesh
- Metal posts and struts
- Strainers
- Tension wires
- Protective gloves
- Spade, shovel
- Screwdriver (for installation using screw piles)
- Concrete, trowel, bucket, wheelbarrow, fine gravel (for installation using concrete)
- Metal spikes (for direct installation into the ground)
- Spirit level
- Metre stick
- Pincers
- Stapler
- Pegs and hammer or spray paint or chalk
Disclaimer
Cavatorta offers these guidelines as recommendations and is offering them as a free service. However, installing our products is at your own risk, so therefore we cannot be held accountable for any damage to your products, garden, or yourself while following these guidelines. This information provides you with a practical level of guidance to erect a fence, we do not intend to enable you to better understand how local Building Regulations might impact on a project you are doing or considering. This document is not a definitive interpretation of Building Regulations. We urge you to seek appropriate professional advice before starting work, and if required choose a registered builder, or a registered installer, to carry out any work.